Veeam Backup & Replication is a powerful software solution designed to protect your data by enabling backup, replication, and recovery across various infrastructures—whether virtual, physical, or cloud-based. This guide will walk you through the step-by-step process of installing Veeam Backup & Replication using the installation wizard.
Step 1: Download Veeam Backup & Replication Software
- Download the Veeam Backup & Replication software (choose the version you need) from the official Veeam website:
https://www.veeam.com/products/data-platform-trial-download.html
For this guide, we’ll use the file: **VeeamDataPlatform_v12.3_20241212.iso**.
Step 2: Mount the ISO File
- Mount the downloaded ISO file to a virtual machine (VM) or physical server using tools like MagicISO or any other ISO mounting software.
Step 3: Launch the Installation Wizard
- Run the setup file to launch the Veeam Backup & Replication installation wizard.
Step 4: Select Components to Install
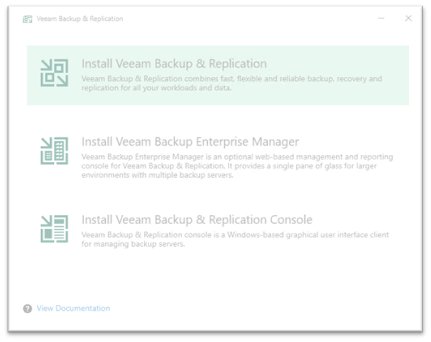
The wizard will present you with three software components to install. Each component serves a specific purpose, so we recommend installing all of them:
- Veeam Backup & Replication: Core software for backup, recovery, and replication operations.
- Veeam Backup Enterprise Manager: Centralized management tool for multiple Veeam Backup & Replication servers.
- Veeam Backup & Replication Console: User interface for managing and monitoring backups on a single Veeam server.
Step 5: Install Veeam Backup & Replication
- Start by clicking on Veeam Backup & Replication. The console is included in this package and will be installed automatically.
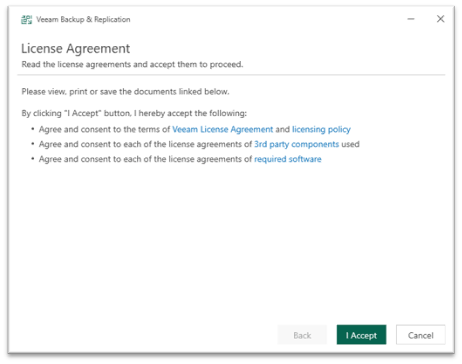
Step 6: Accept the License Agreement
- Review and accept the license agreement by clicking **”I Accept”**.
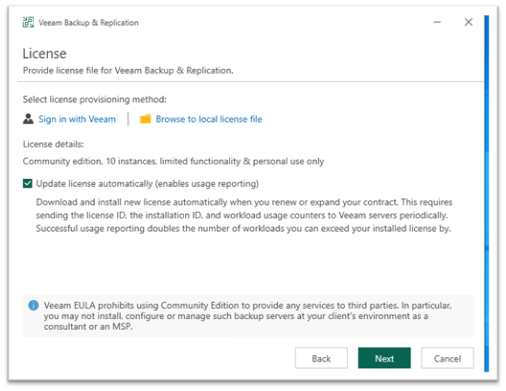
Step 7: License Activation
- You can choose to license your Veeam software at this stage by either signing in to your Veeam account or uploading a license file from local storage. For this guide, we’ll skip this step and activate the license later.
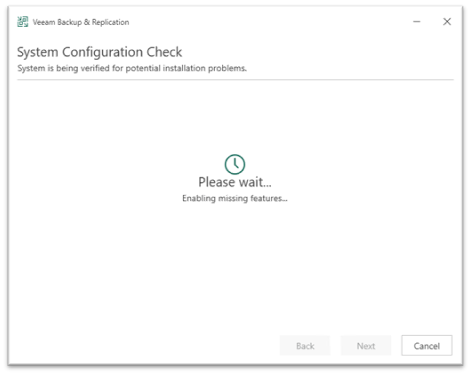
Step 8: System Configuration Check
- The wizard will perform a system configuration check to ensure all required software components are installed. If any components are missing, the wizard will attempt to install them automatically. If the wizard cannot install the missing components, you’ll need to install them manually and click Retry to continue.
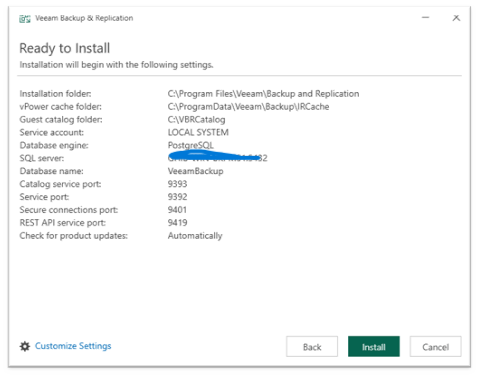
Step 9: Review Installation Settings
- Review the default installation settings, including the installation location. If everything looks correct, click “Install“.
Step 10: Customize Installation Settings (Optional)
If you click on “customize settings” on the screen above, you can configure the following:
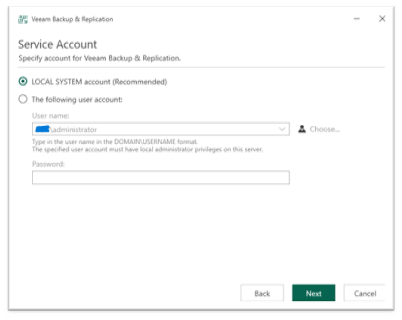
a. Service Account
– Choose between the **LOCAL SYSTEM account** (recommended) or a **Custom user account** with administrator permissions.
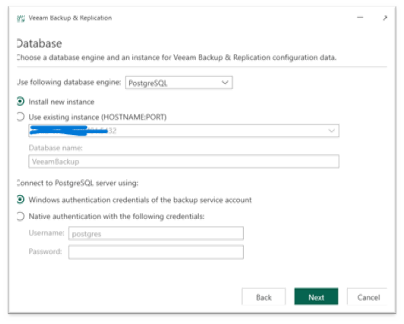
b. Database Configuration
– Select the database engine: **PostgreSQL** or **Microsoft SQL Server**.
– Configure the instance settings and authentication mode (Windows authentication or SQL Server authentication).
c. Data Locations
– Specify the installation folder, guest file system catalog, and instant recovery write cache locations.

d. Port Configuration
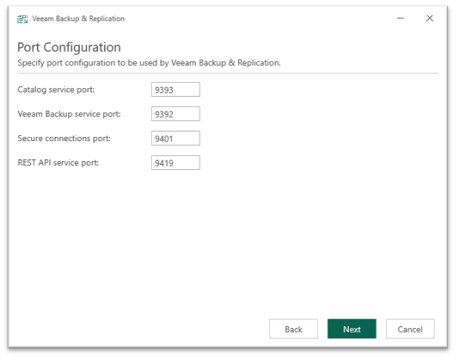
– Configure the ports used for communication between Veeam components. The default ports are usually sufficient unless they conflict with other services.
- Catalog service port: Used to replicate catalog data from backup servers to Veeam Backup Enterprise Manager.
- Veeam Backup service port: Allows Veeam Backup Enterprise Manager to retrieve data from backup servers. This port is also used by the Veeam Backup & Replication console to connect to the backup server.
- Secure connections port: Used by the mount server to communicate with the backup server.
- REST API service port: Used for communication with the Veeam Backup & Replication REST API.
Step 11: Review and Start Installation
- Review all the installation settings. If everything looks correct, click **Install** to begin the installation process.

Step 12: Installation Progress
- The installation process will take approximately 20 minutes to complete. During this time, the wizard will install the database, backup and replication software, console, Veeam Explorers, and other components.
Step 13: Reboot (Optional)
- Once the installation is complete, you can reboot your server if necessary.
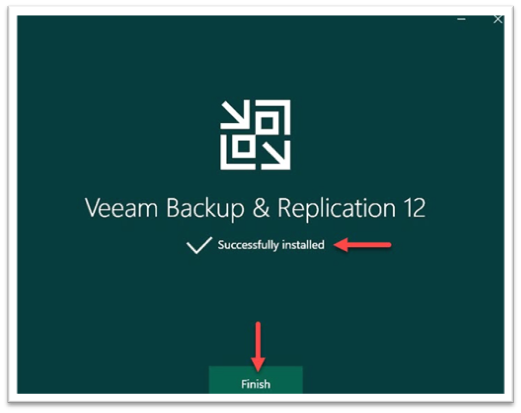
Conclusion
Congratulations! You’ve successfully installed Veeam Backup & Replication version 12. You’re now ready to connect to your backup servers and implement your data backup strategy. Veeam’s intuitive interface and powerful features will help you safeguard your data across virtual, physical, and cloud environments.
Happy backing up!
Leave a Reply